SUPPLY ZONES: The Institutional Trap Most Traders Miss
Supply isn't just resistance - it's where smart money unloads positions. Here's how to spot the real distribution zones:
Anatomy of a Killer Supply Zone:
Where price previously stalled with volume
Left by failed breakouts (trapped buyers)
Aligned with Fibonacci extensions (61.8% or 127%)
Coincides with large liquidity pools
Advanced Supply Zone Tactics:
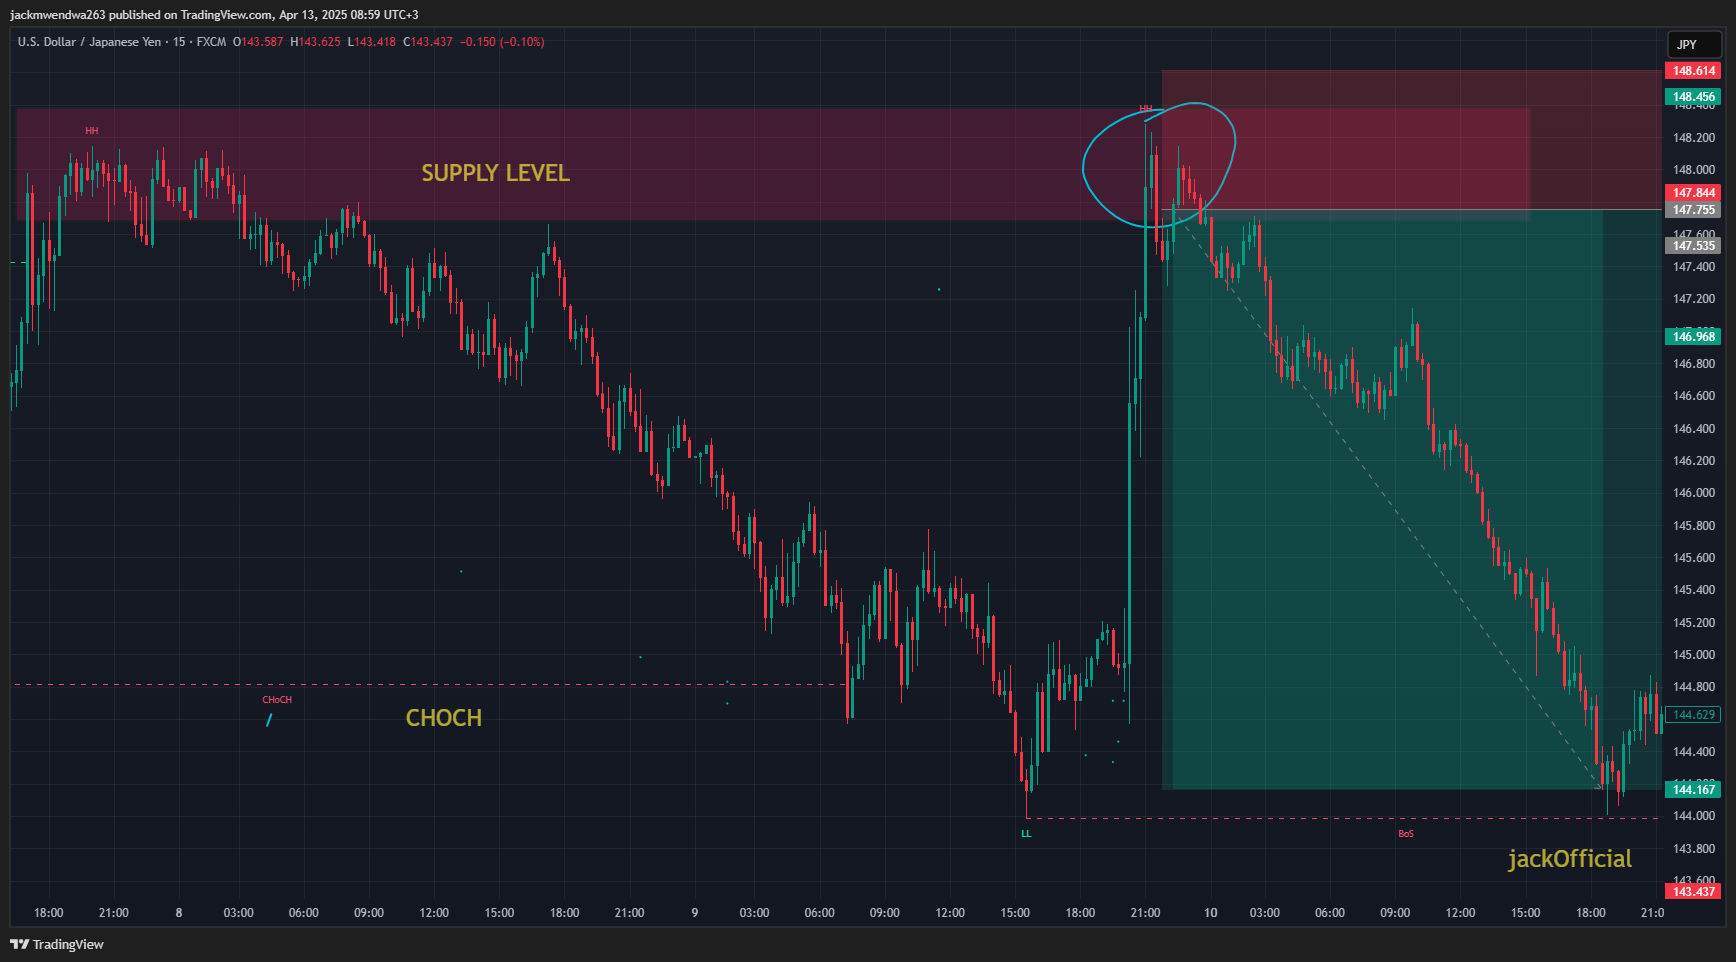
The Liquidity Grab - Price often spikes ABOVE supply before reversing
Volume Divergence - Decreasing volume on approaches = weak demand
Time Decay - Older zones (>2 weeks) lose potency unless refreshed
3 Signs Supply Will Break:
✓ Absence of strong rejection candles
✓ Gradual absorption of supply (small candles)
✓ Volume expanding on approach
How the 1% Trade Supply Zones:
• Aggressive: Short first test with stop above recent high
• Patient: Wait for clear rejection candle (pinbar/engulfing)
• Breakout: Trade retest after clean breakout (failed supply = support)
Pro Tip: The best shorts come when retail buys the "breakout" into supply.
Drop a if you've been trapped in a supply zone before!
#OrderFlowTrading #SmartMoney
Supply isn't just resistance - it's where smart money unloads positions. Here's how to spot the real distribution zones:
Anatomy of a Killer Supply Zone:
Where price previously stalled with volume
Left by failed breakouts (trapped buyers)
Aligned with Fibonacci extensions (61.8% or 127%)
Coincides with large liquidity pools
Advanced Supply Zone Tactics:
The Liquidity Grab - Price often spikes ABOVE supply before reversing
Volume Divergence - Decreasing volume on approaches = weak demand
Time Decay - Older zones (>2 weeks) lose potency unless refreshed
3 Signs Supply Will Break:
✓ Absence of strong rejection candles
✓ Gradual absorption of supply (small candles)
✓ Volume expanding on approach
How the 1% Trade Supply Zones:
• Aggressive: Short first test with stop above recent high
• Patient: Wait for clear rejection candle (pinbar/engulfing)
• Breakout: Trade retest after clean breakout (failed supply = support)
Pro Tip: The best shorts come when retail buys the "breakout" into supply.
Drop a if you've been trapped in a supply zone before!
#OrderFlowTrading #SmartMoney
🔥 SUPPLY ZONES: The Institutional Trap Most Traders Miss 🔥
Supply isn't just resistance - it's where smart money unloads positions. Here's how to spot the real distribution zones:
🎯 Anatomy of a Killer Supply Zone:
📍 Where price previously stalled with volume
📍 Left by failed breakouts (trapped buyers)
📍 Aligned with Fibonacci extensions (61.8% or 127%)
📍 Coincides with large liquidity pools
💡 Advanced Supply Zone Tactics:
The Liquidity Grab - Price often spikes ABOVE supply before reversing
Volume Divergence - Decreasing volume on approaches = weak demand
Time Decay - Older zones (>2 weeks) lose potency unless refreshed
🚨 3 Signs Supply Will Break:
✓ Absence of strong rejection candles
✓ Gradual absorption of supply (small candles)
✓ Volume expanding on approach
💰 How the 1% Trade Supply Zones:
• Aggressive: Short first test with stop above recent high
• Patient: Wait for clear rejection candle (pinbar/engulfing)
• Breakout: Trade retest after clean breakout (failed supply = support)
📌 Pro Tip: The best shorts come when retail buys the "breakout" into supply.
👇 Drop a 🎯 if you've been trapped in a supply zone before!
#OrderFlowTrading #SmartMoney

·188 Views
·0 voorbeeld